How to create a Workspace and generate your first invoice?
After successfully logging in, you will be redirected to the following page:

Please note that, once you log in for the first time, activate a free trial on any plan from the billing page. After that, you can follow the steps below to create your workspace, add new customers, and generate invoices.
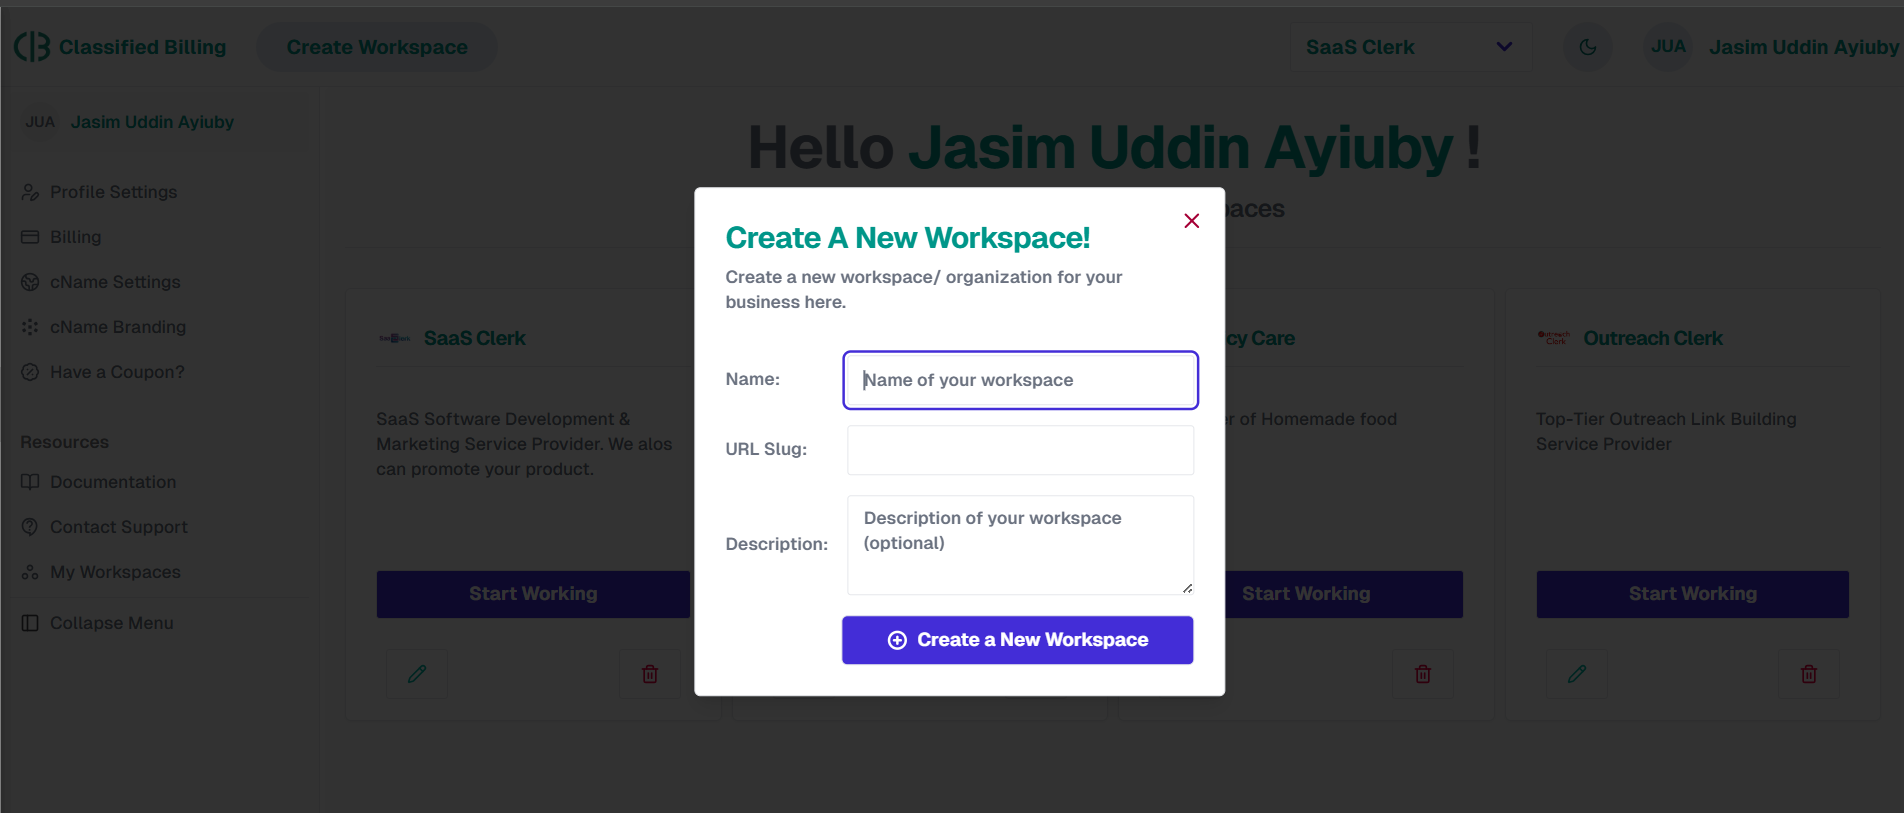
Once your free trial, lifetime deal, or any paid subscription is activated successfully, click on the 'Create Workspace' button.

A popup will appear, allowing you to enter your workspace name and description. Write your desired workspace name and description and click on the Create a New Workspace button. Now you’re done.
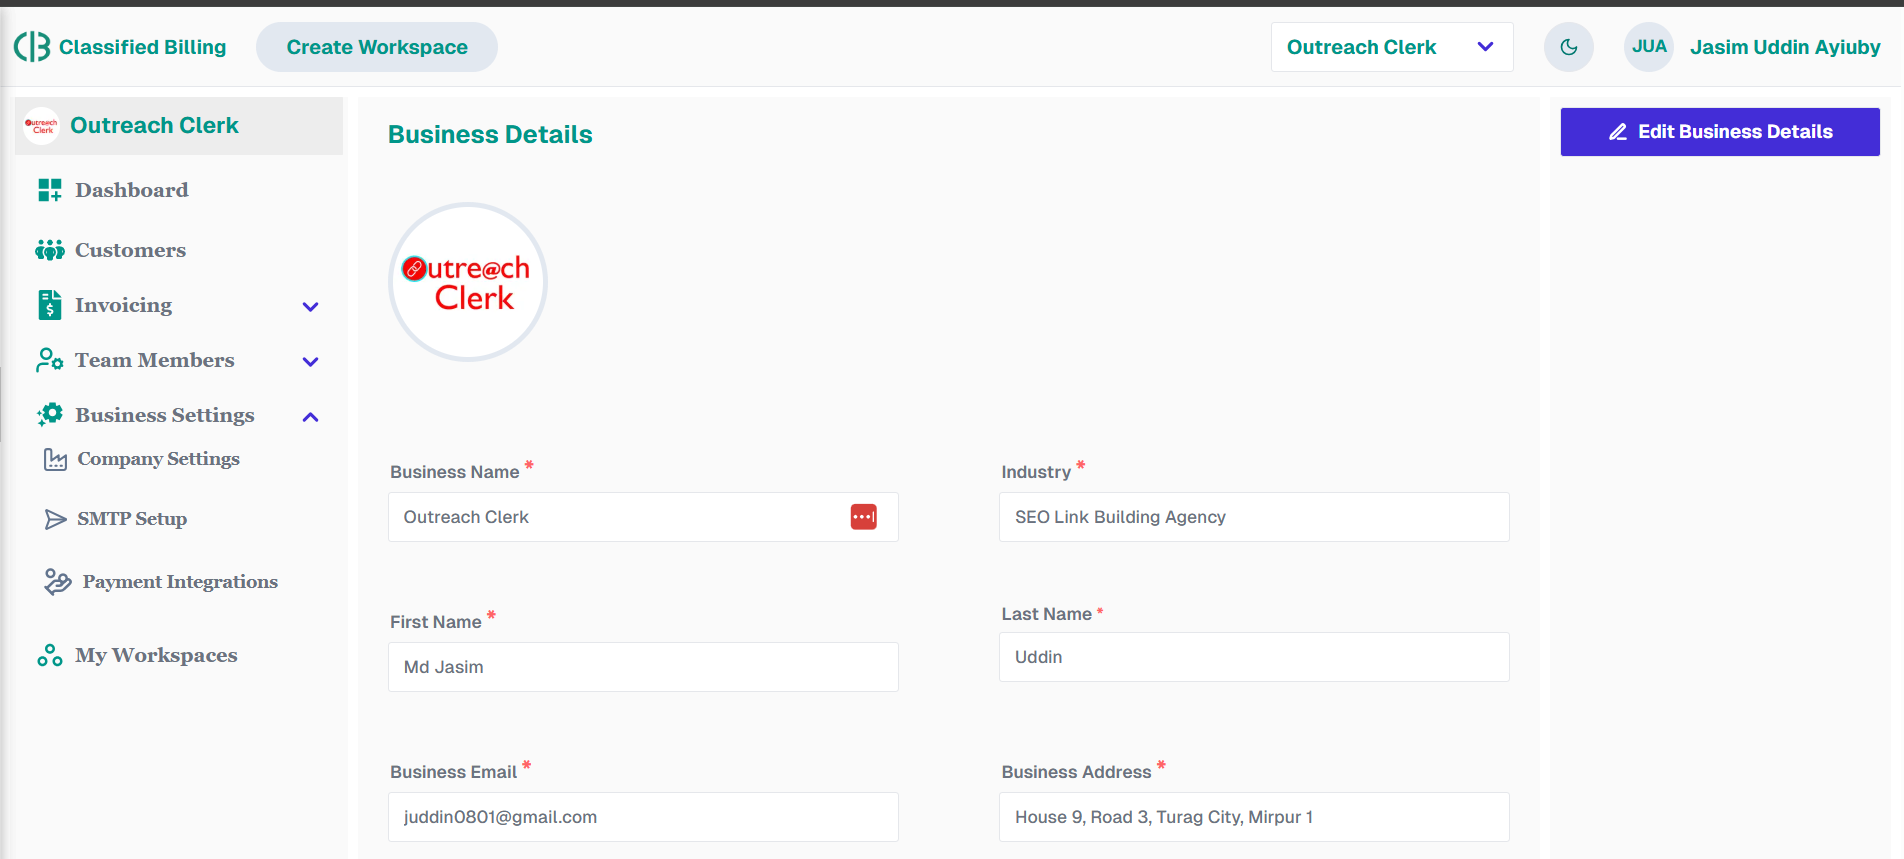
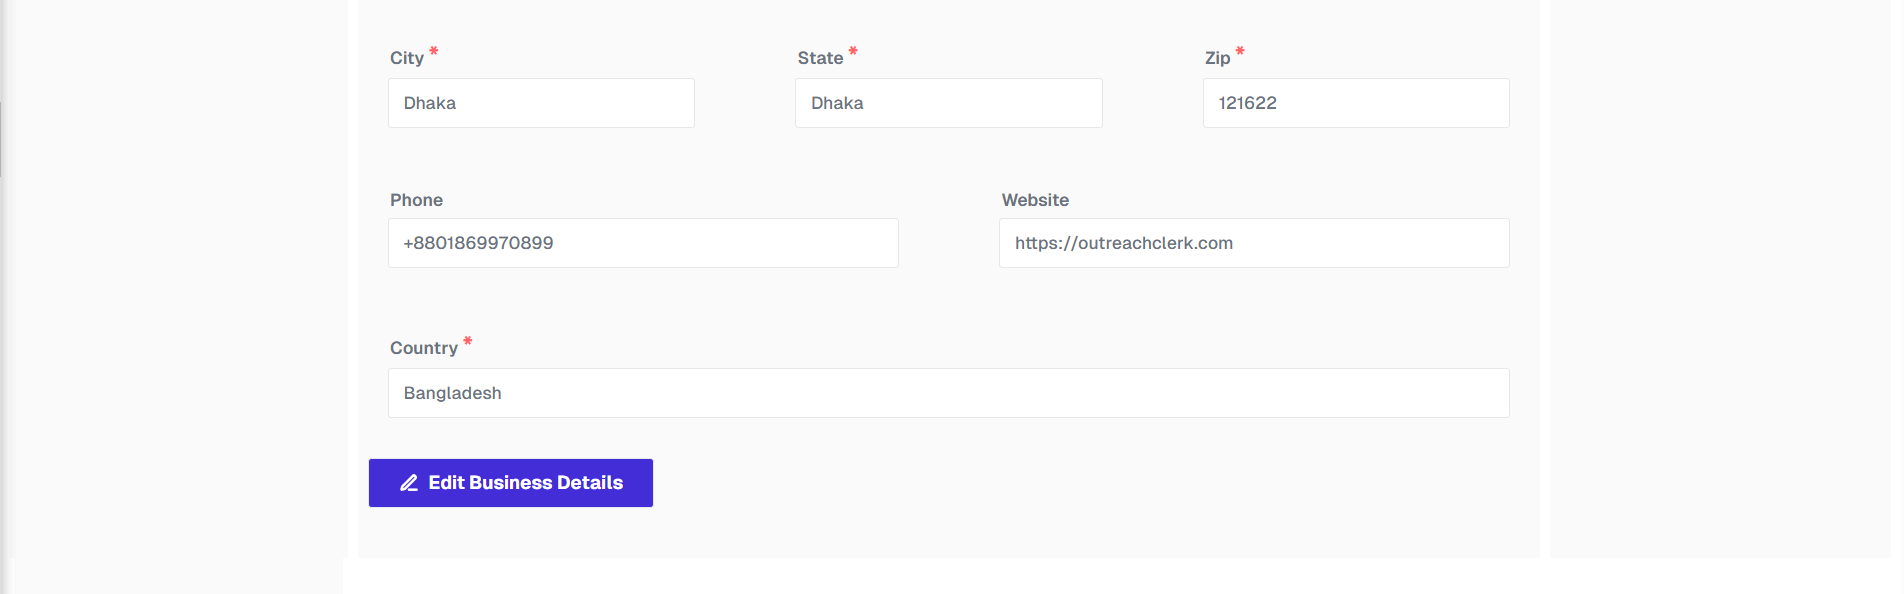
After creating the workspace, you'll go to the Company Settings page to enter your agency or company details.
Add your Company/Agency Logo, fill in the other details, and click on the Save Business Details button.
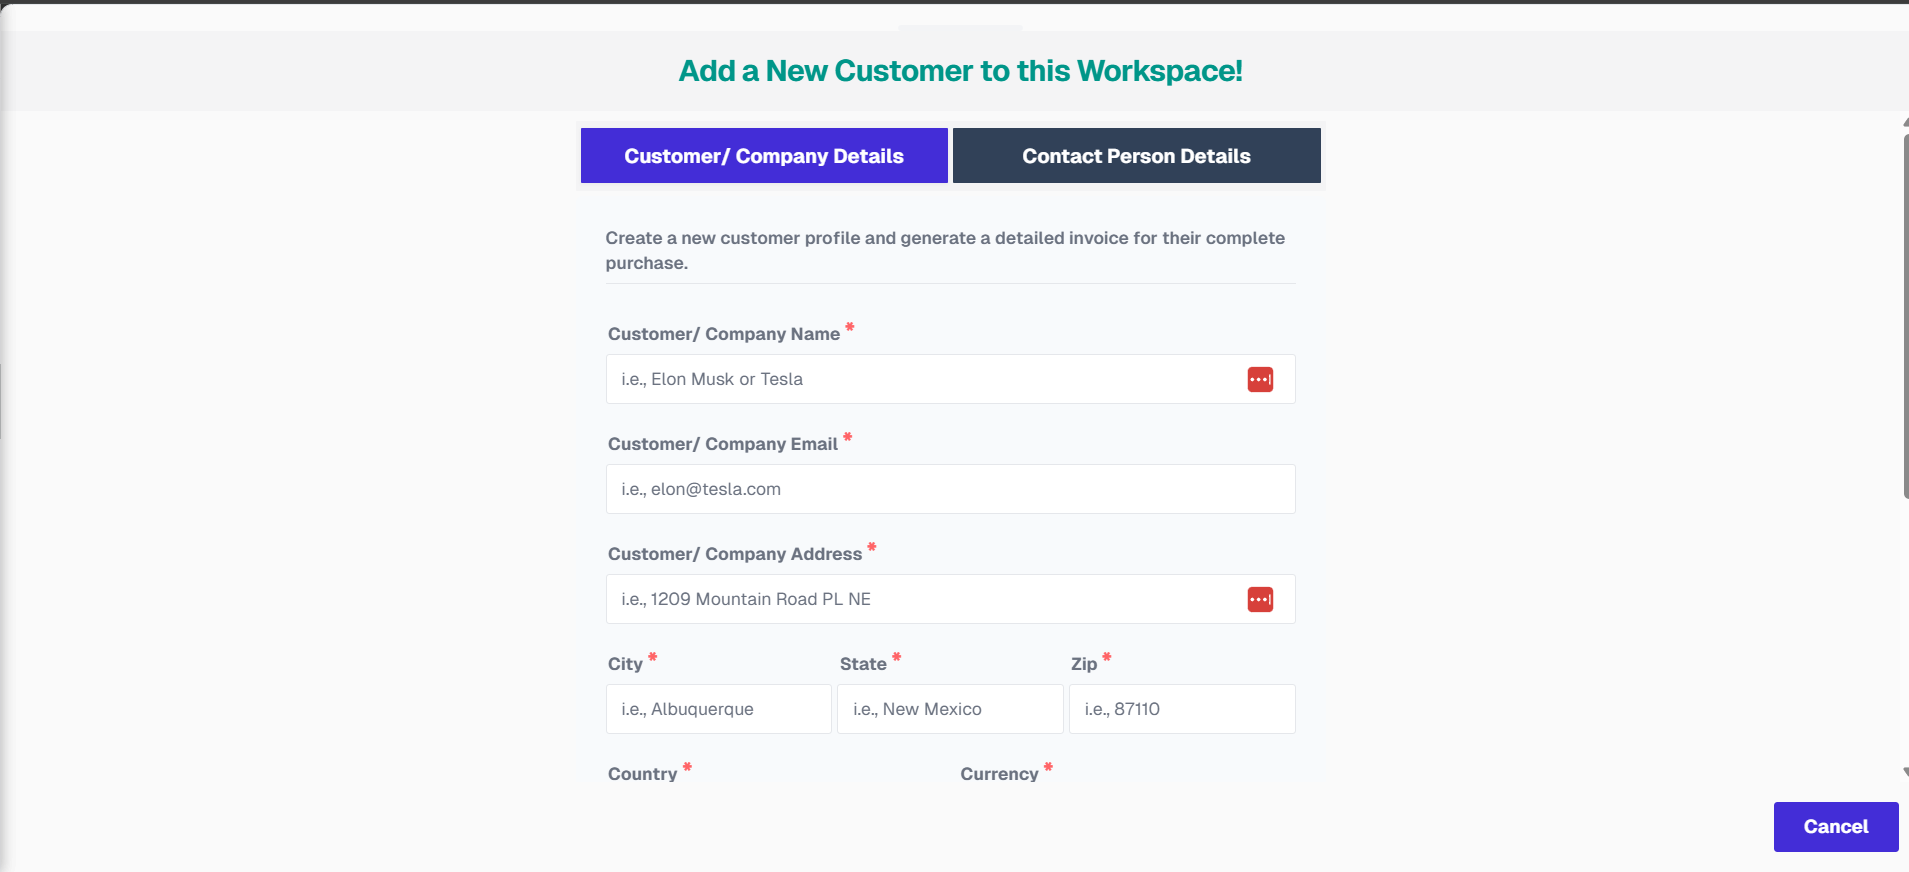
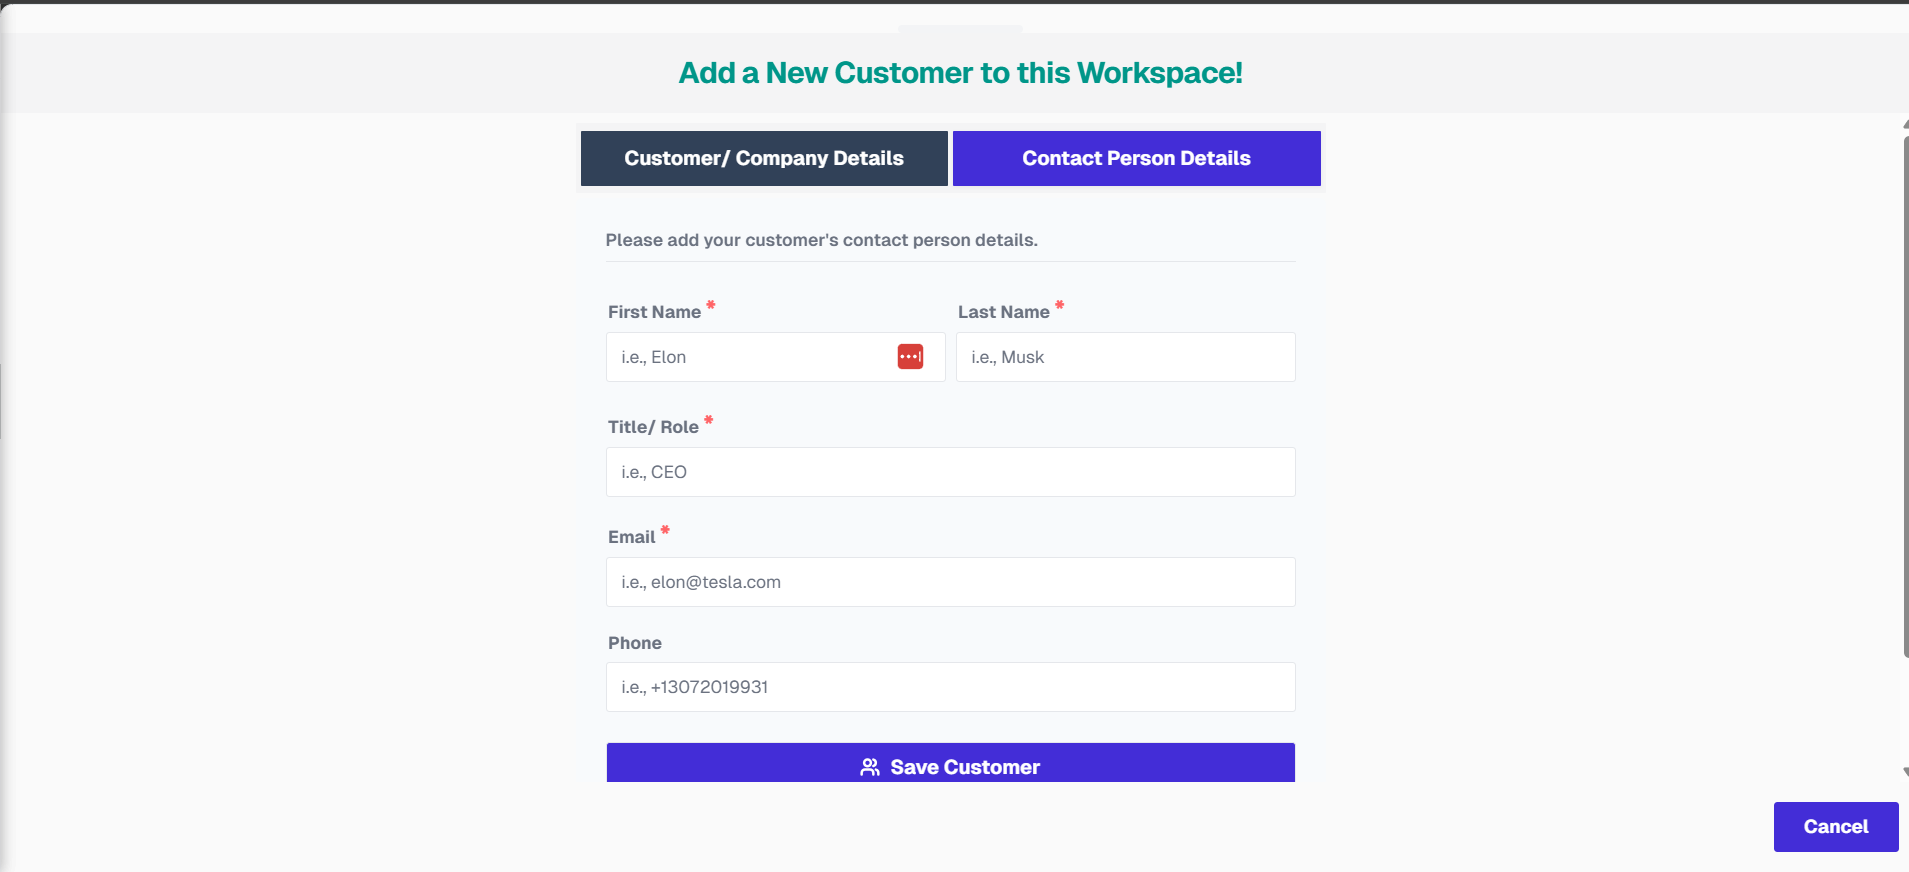
Once you have created your business details, you will be redirected to the customer list page. There, you can add your customers.
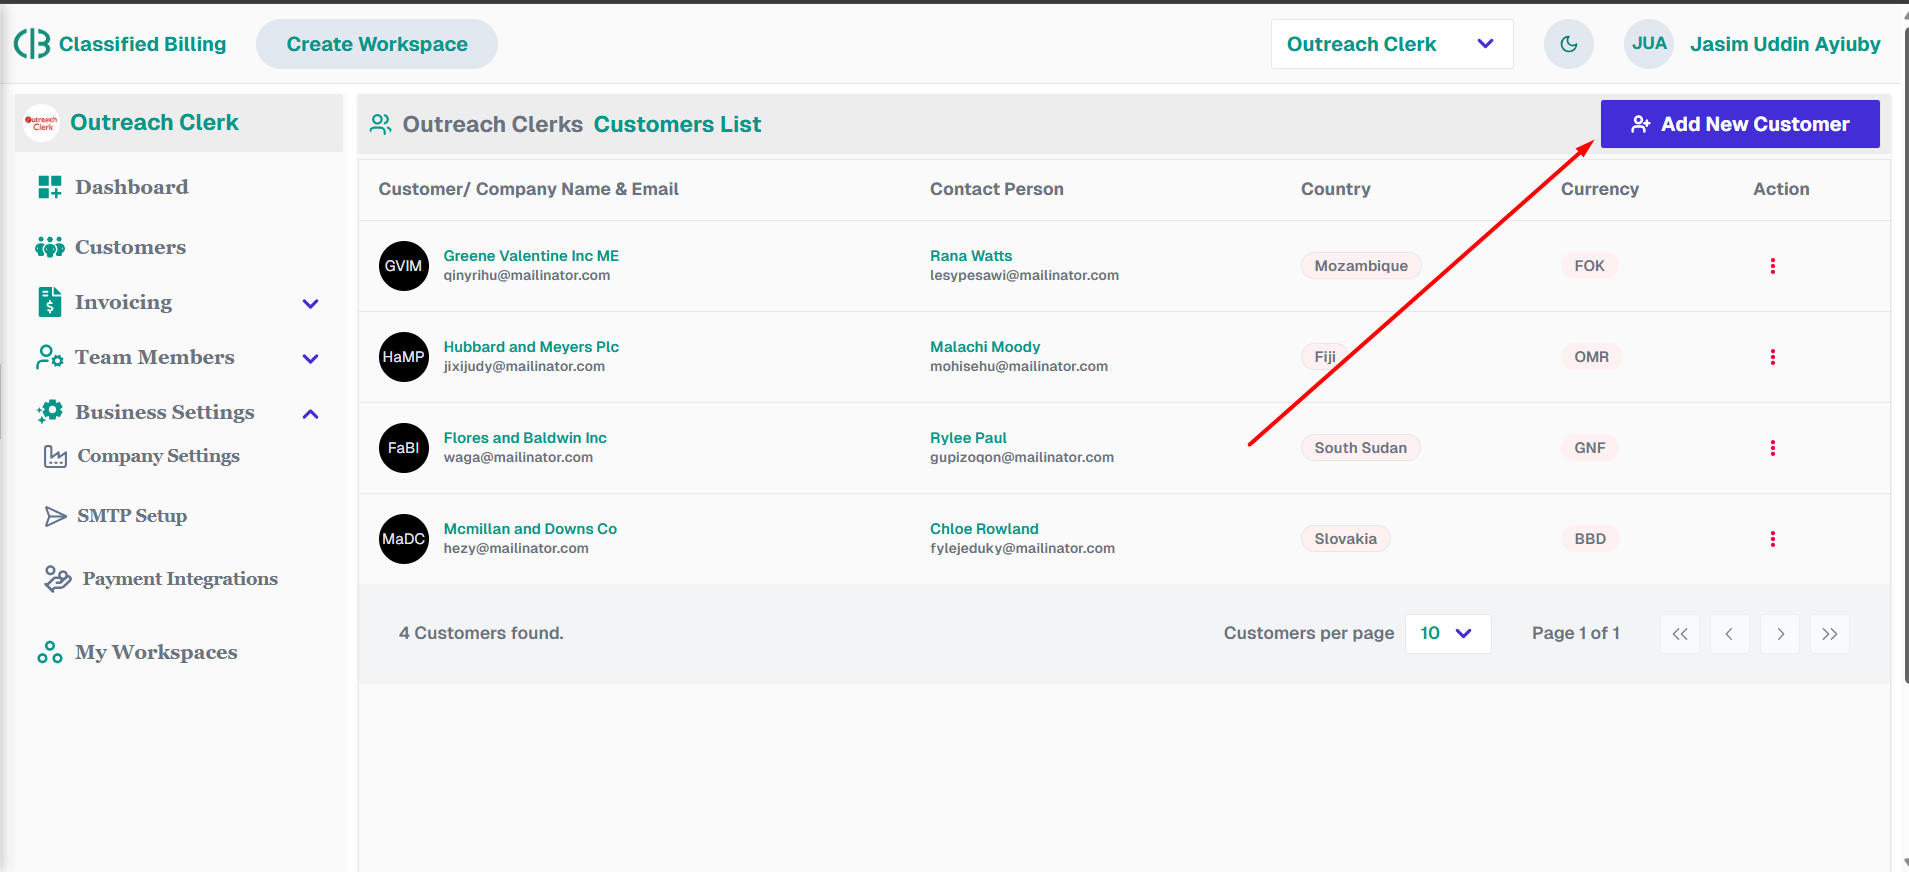
Now click on the Add New Customer button. It will open a new form to add your customer details like below. Fill all the necessary details below and click on the Save Customer button.
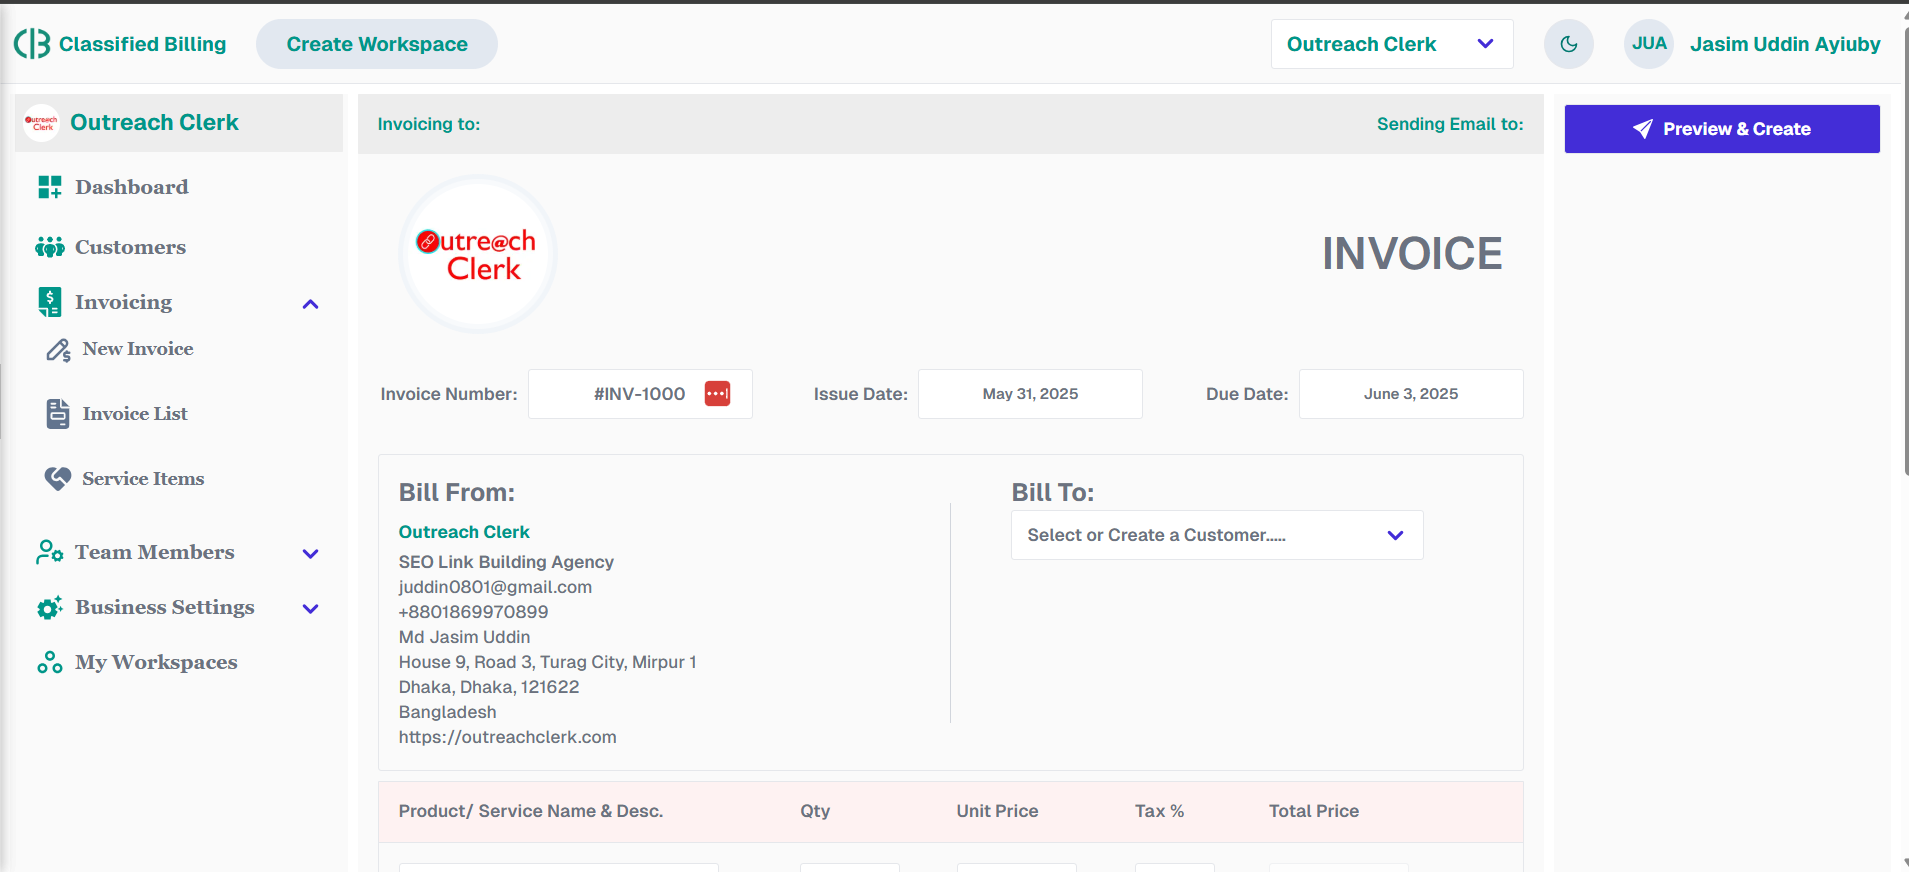
After creating your customer profile, you will be redirected to the new invoice page. Here, your business details will be automatically loaded in the “Billing From” section. In the “Bill To” section, you will find a dropdown menu to select a customer. Simply choose the customer for the invoice.
Don’t forget to add the invoice number, issue date, and due date.
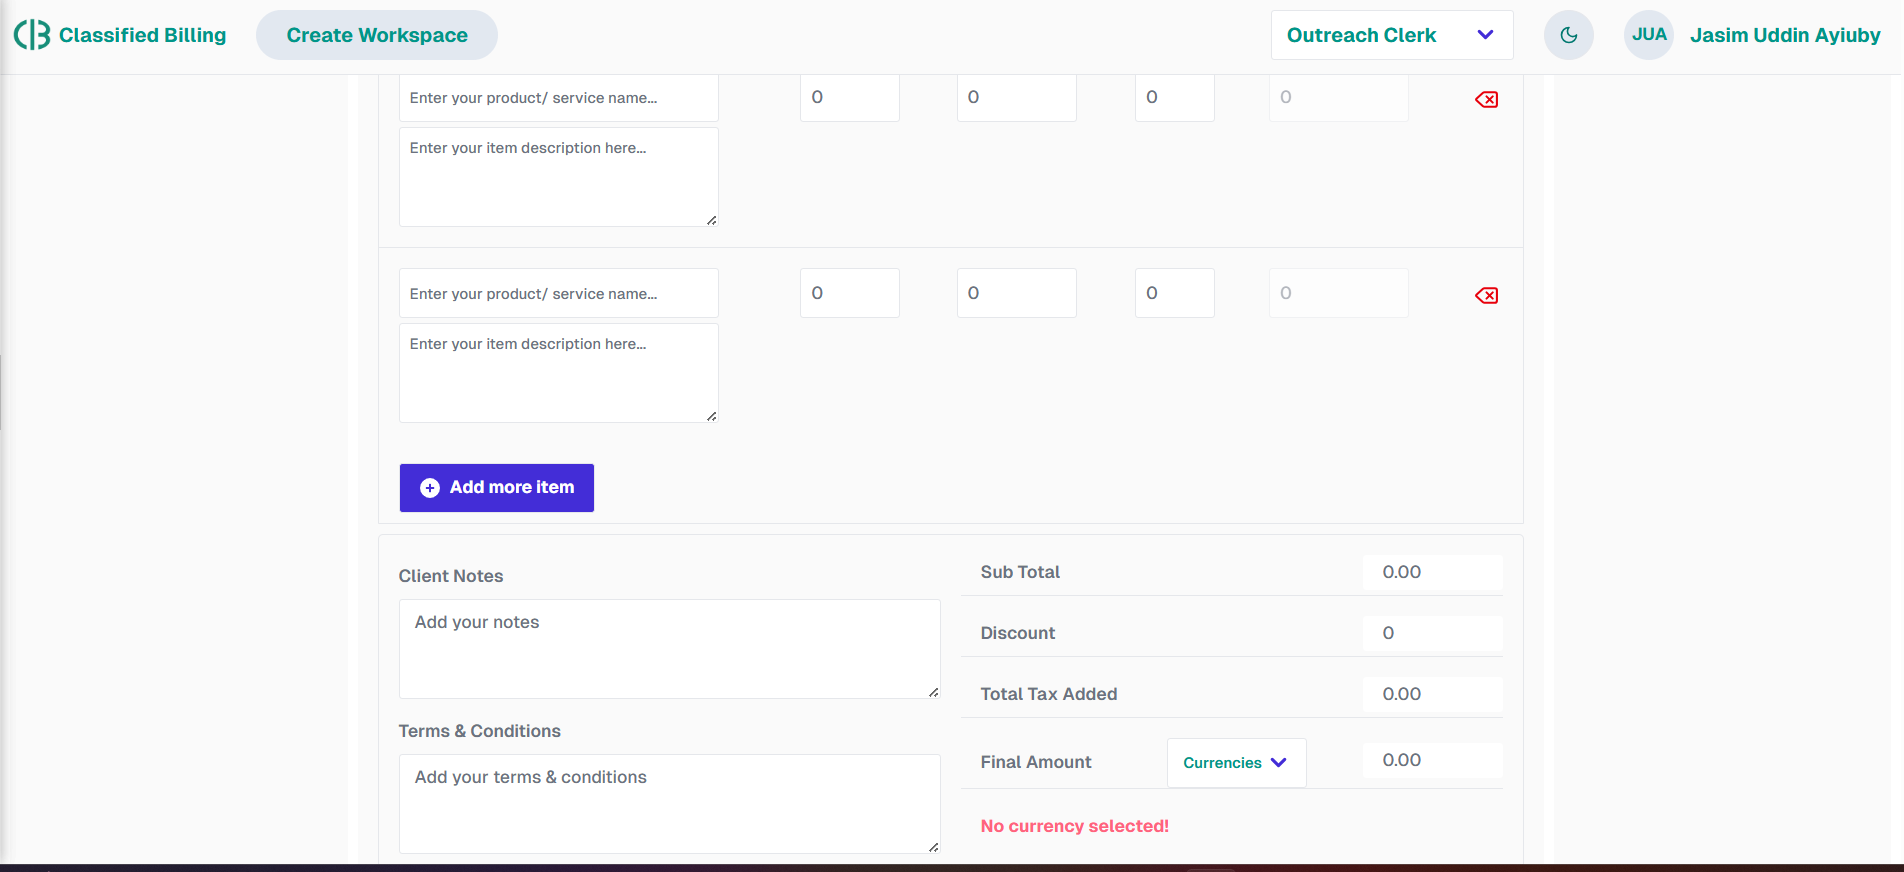
Fill in the product/service details, Quantity, Unit price, Tax (if necessary). Add or remove rows as per your needs. Add discount amount, select currency for final amount, add client note, and include terms and conditions in the summary section.
After completing everything, go to the top and find a button named “Preview & Send” on the right sidebar. Click on it to preview your invoice before saving and sending it to your customer.
If you see mistakes in the preview, you can click the “Back to Edit Invoice” button to make changes.

Once you finish editing, click “Preview & Send”, and then click “Save & Send Invoice”. Within a few seconds, you can see your final version of your particular invoice.
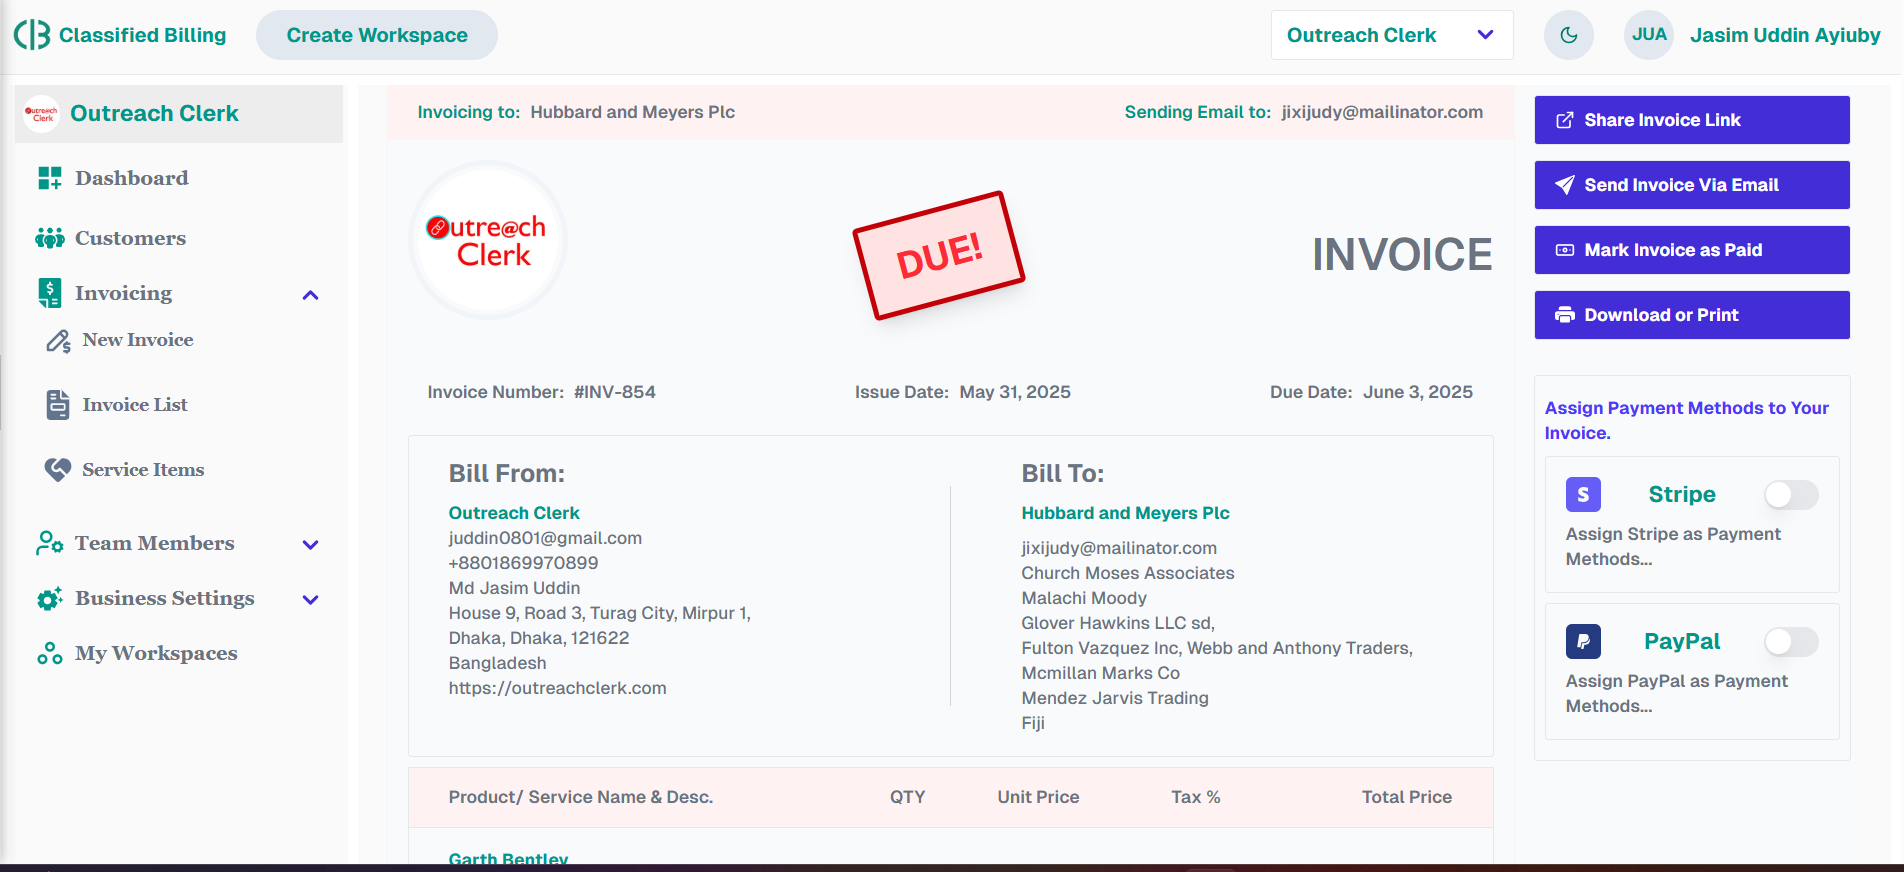
In your final invoice, you will find two buttons. One button sends the invoice to your customer, while the other allows you to print or download it.
Click on the Send Invoice button. You can send the invoice to your customer’s email. The email address will auto-fill from your customer's details, but you can edit it and use any email address you prefer.
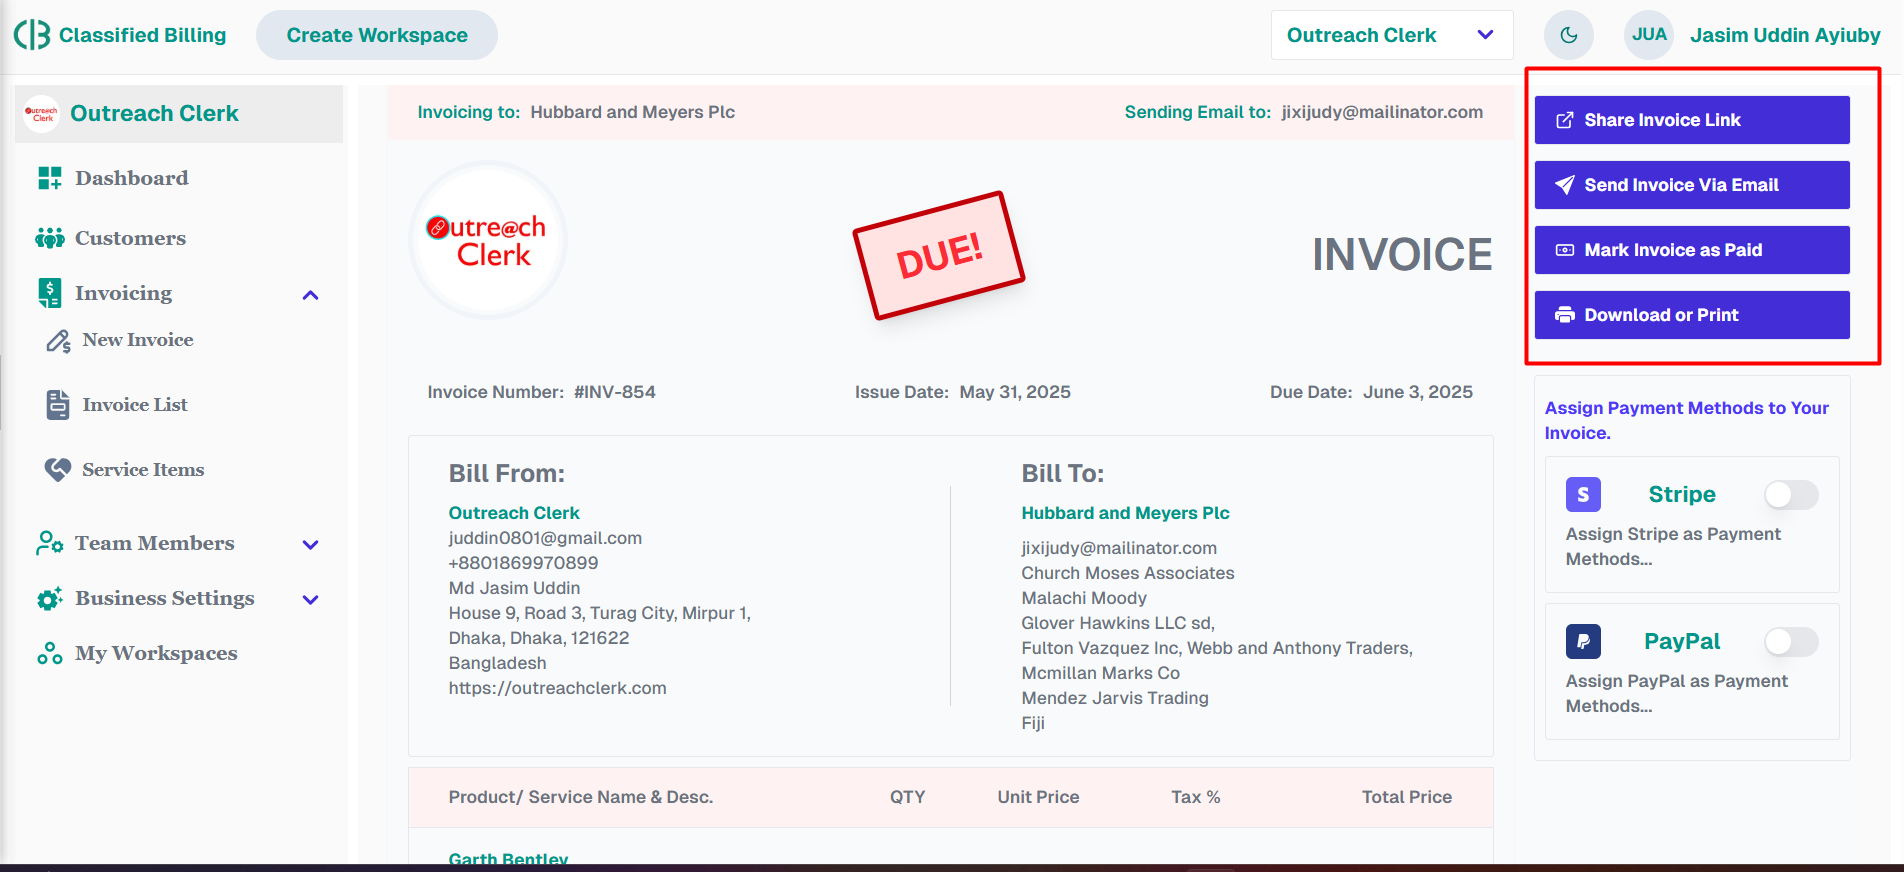
You can also copy the invoice link to easily share it through any channel. Just click on the “Click to Copy Invoice Link” button.
Now you have successfully made your first invoice!
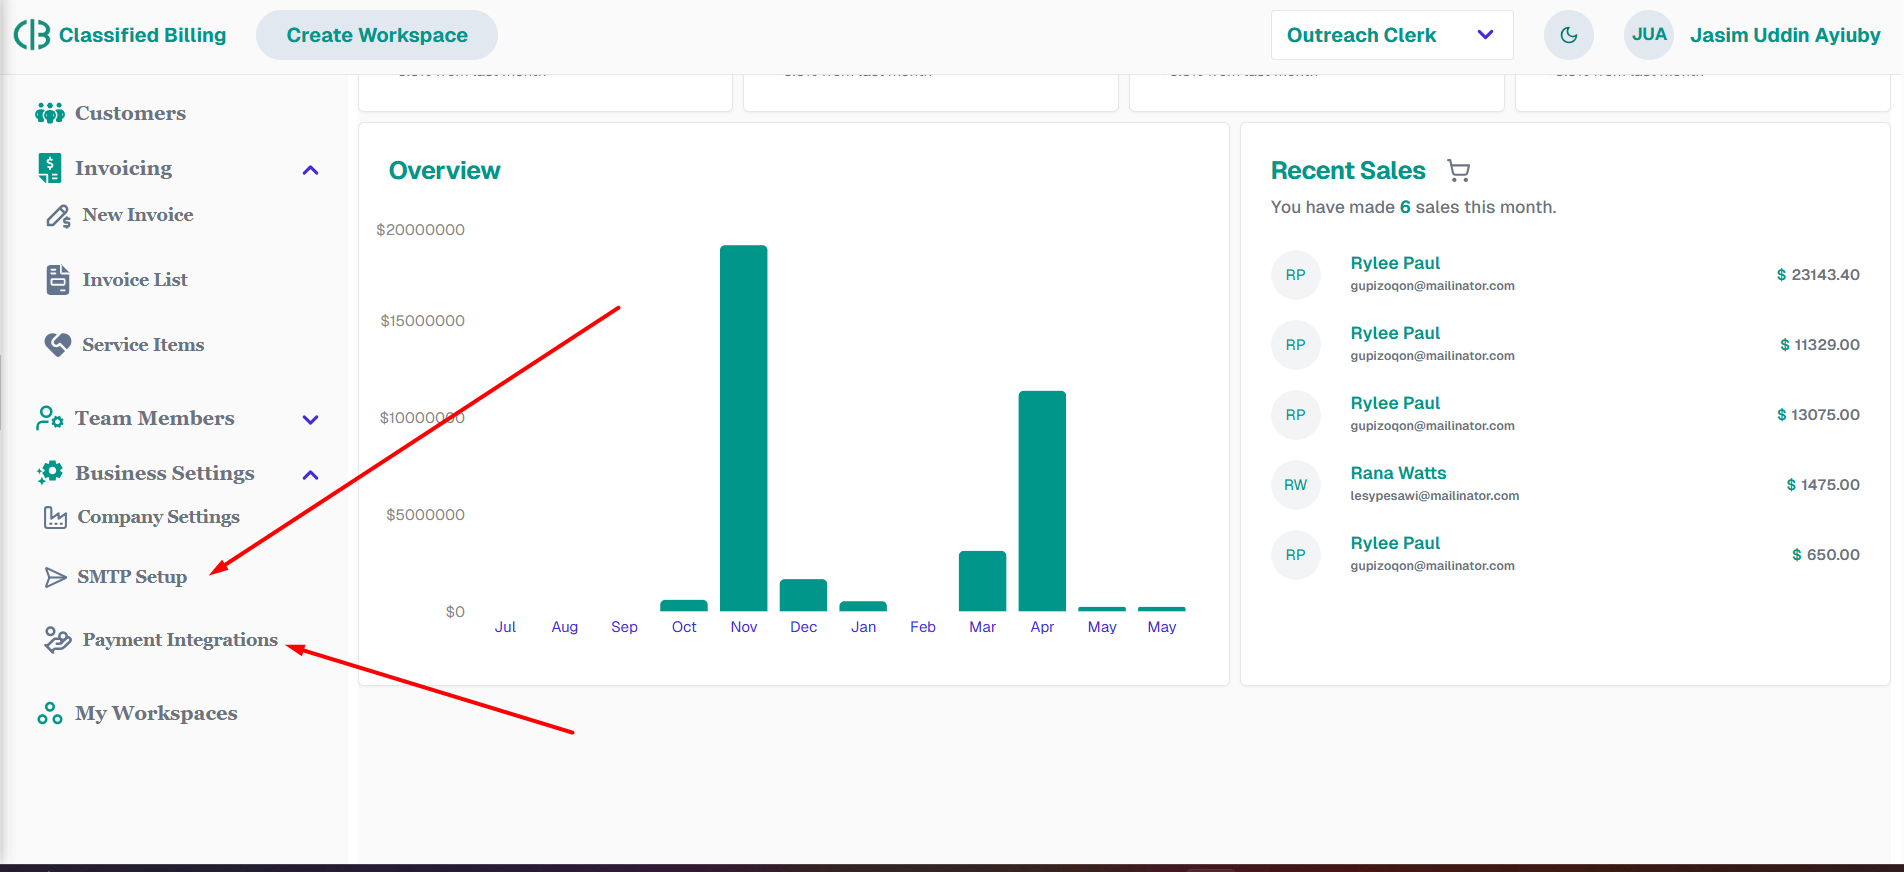
Please remember that: When sending invoices to customers, the system will use our default email address by default. To use your own sender email, set up a custom SMTP in the Settings menu for each workspace.
Similarly, To use Stripe payment on your invoice, connect your own Stripe account in the workspace settings.
Good luck with your first invoice and your business!